2. Quickstart
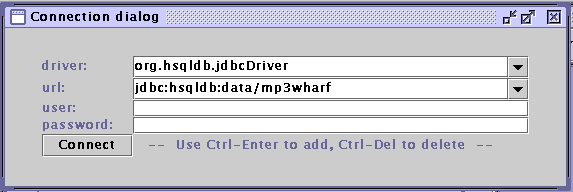
Start up the program. You will se a window called "Connection Dialog". Here you can select the database type and name that you want to use. If you are running a database server on your computer, like mySQL, you can use this to store your data. If you don't have such a server, you use the 'built-in' HSQL database engine, that comes packaged with this software. For this, make the selection like in figure 1.

Figure 1. Connection Dialog
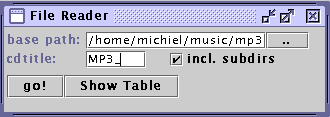
Next you can start to add data to the database. You do this with the "File Reader" tool. Select "Tools/File Reader" to start this tool. You will now see the dialog in figure 2. In the upper textfield you can enter the base path to start searching mp3 files from. Use the button with the two dots to open a path selection dialog. Because all paths are stored relative to the base path and you might have a removable media, you can specify a title for identification of the location later on. You would normally check the "include subdirs" box too. Press Go! to start the search process. You will see a status indicator for progress. First, a list of all the files in the specified location is generated. After this, all files found are scanned for ID3 tags, or the song info is parsed from the filename. After the scanning is completed, you will see a table with the results. Should you close this table, than you can always open it again by pressing "Show table" on the File Reader dialog

Figure 2. File Reader dialog
Next you probably want to edit the data that was scanned. To quickly copy information up or down, use Ctrl-up and Ctrl-down. To copy data elsewhere, use Ctrl-c or Ctrl-v on a single cell or a block of data. You can sort on a column by right or left clicking on it's header.
Once finished editing you need to save the data to the database. Choose "Options/Save to DB" from the table menu. Since you have not defined a table so far, choose "new table", enter a name and choose OK. You will notice that all the records have suddenly been assigned id numbers, by which they are uniquely identified in the database. Since you don't need the records anymore, and you don't want them to again appear on the next scan, choose "Options/Clear" from the table menu.
Now that you have the first data in your database, you start making selections from the database. The fastest and easiest way to this is by directly querying it using the SQL language. If you don't know this, you probably want to read the SQL introduction, or proceed using one of the graphical querying tools.
Back to index

